Seeing the time is nearly there, I thought it would be fun to do a little Halloween Mail Art tutorial for this week's Mailart Monday.
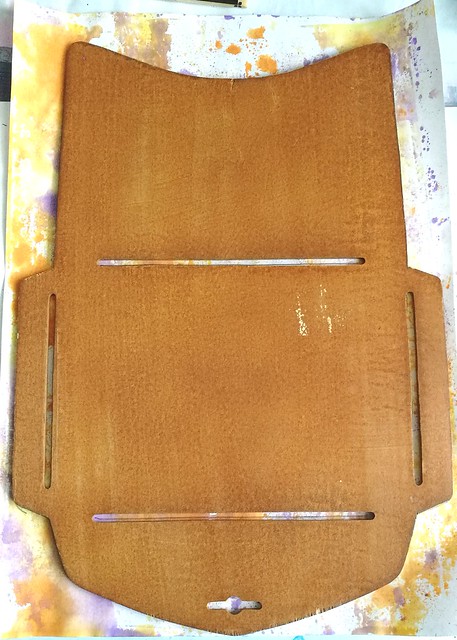
I started off by using a piece of 100gms white A4 paper and used it to blot off some excess orange and violet ink for another project I was working on. Purple and orange are in my eyes the best color combo for this time of year! I have a few envelope templates and I used this wooden one from a Japanese brand which makes the 6x4 inch envelop when folded.
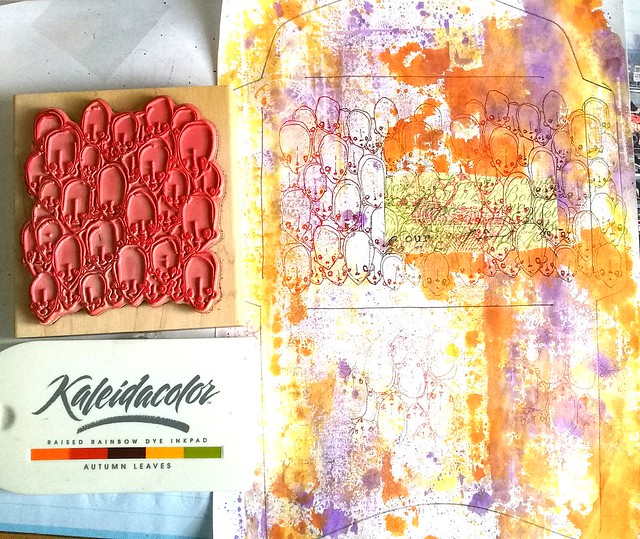
After I traced the template with a pencil, I took the heads stamp from Stampotique Originals and stamped it on the page a few times inked with Kaleidacolor Autumn Leaves. I made sure I stamped the reverse on the lower part seeing that is going to be the back side folded up. Oh and I used a bit of post it tape to mask the part where the address is going to be before I went stamping :)
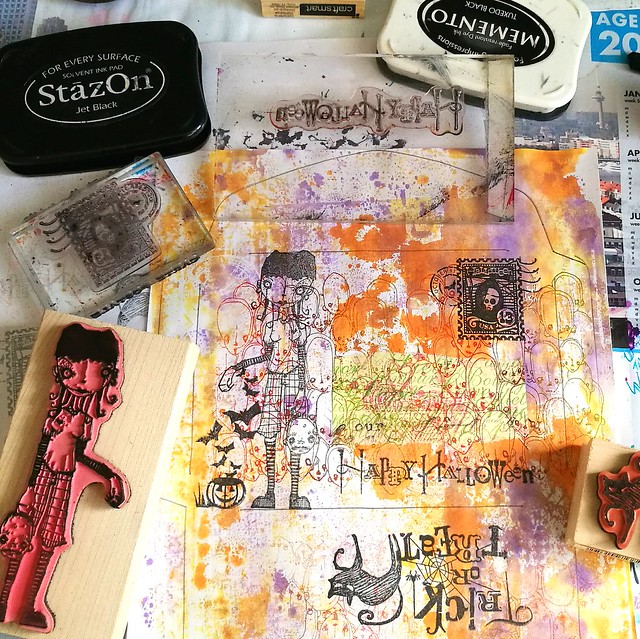
The I took a couple of more stamps which fit the theme, from Inkadinkadoo and the focal point was going to be Linda by Daniel Torrente. She is naturally spooky and fit well with the Trick or Treat theme.
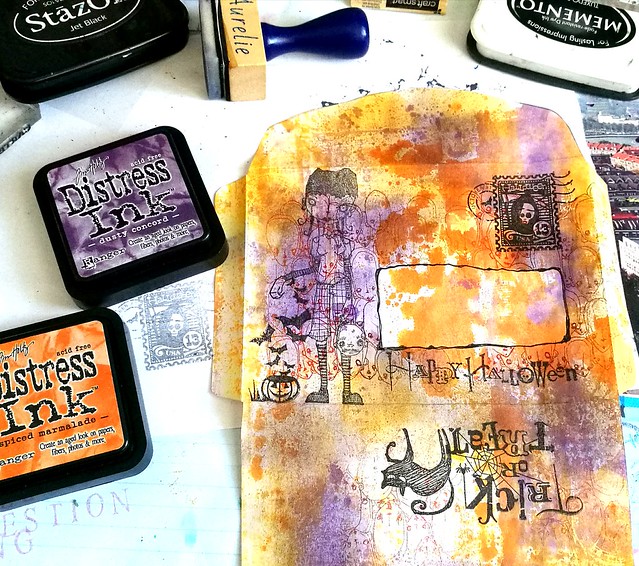
I then cut out the envelope and added more color to it by using the blending tool and dusty concord and spiced marmalade distress inks. Took away the mask and doodled around the space to mark off that address border.
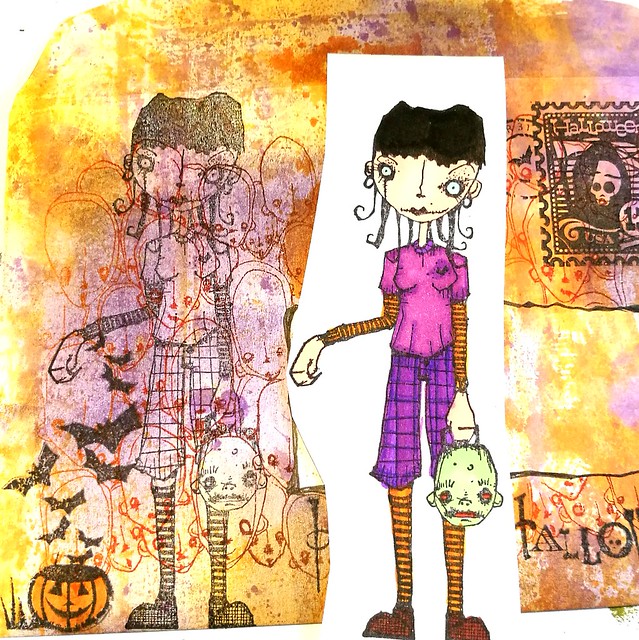
The I stamped Linda again on a piece of sticker paper, colored her in with complementary colors in Letraset Promarkers and adhered her to her spot on the envelope after cutting her out. Then folded the envelope and glued the flaps in place and called it done!.
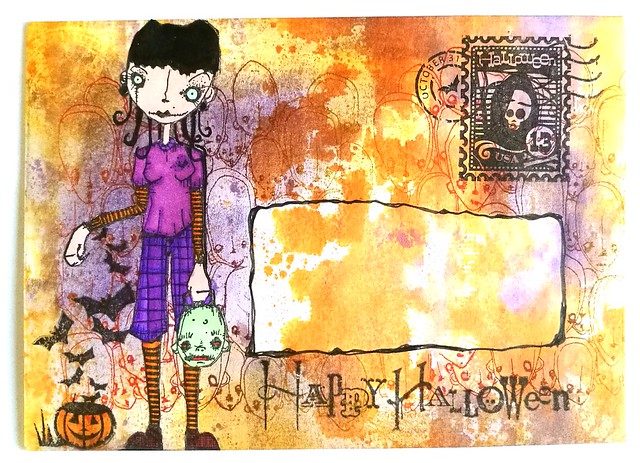
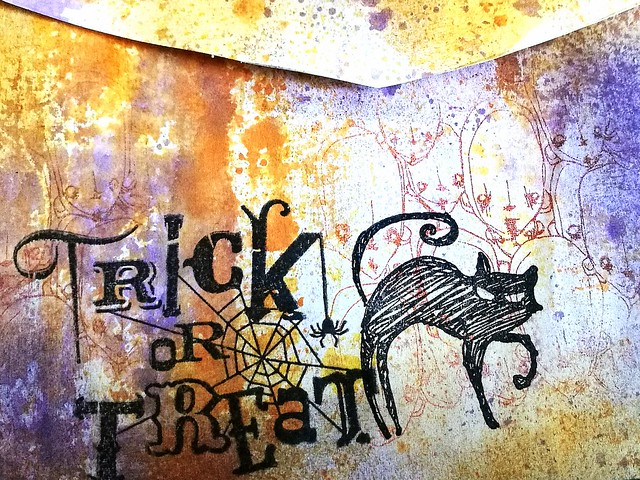
The end result: this is the front. Linda pops out and the address block is definitely light enough for writing but also distinct with that splash of color in it.
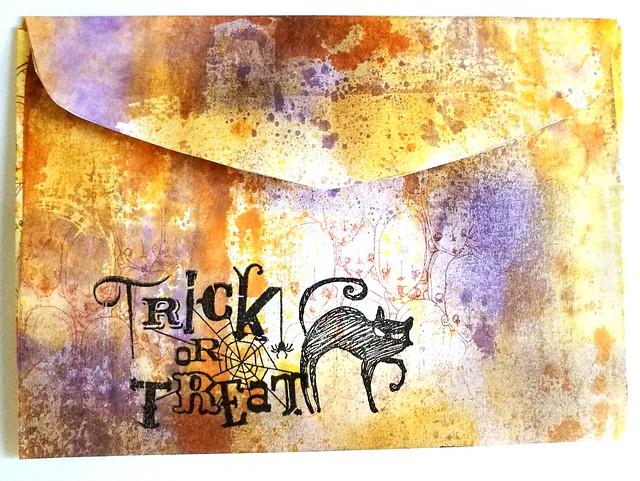
And the back; I kept it simple and mysterious by just adding a few stamps and making sure the heads were visible through the lighter spots. When the address is written on I am planning on applying some varnish to seal it so it travels safely to its destination.
The creative people at the Stampotique Desigener's Challenge have a lot more examples for fun Halloween mail projects and I am entering this for their fun Halloween fortnight challenge.
Also entering this one for the Mixed Media Monthly Challenge for October with the Halloween theme

Also entering this one for the Mixed Media Monthly Challenge for October with the Halloween theme

Next week monday it is actually Halloween, do you have anything special planned? Either way, hope you have a fantastic week and thanks for stopping by!
Namasté
Ben geen fan van doodskoppen, maar zo voor halloween en met de rest in de hoofdrol passen ze helemaal hierop! Groetjes en fijne week, Gerrina
ReplyDeleteGorgeous Halloween Project! Love the colours and fabulous textures and layers
ReplyDeleteThank you for taking part in the Stampotique Challenge
Jools x
Fab Halloween mail art, perfect for SDC this week. x
ReplyDeleteBrilliant idea, love this! Thanks for joining our Stampotique Designers Challenge!
ReplyDeleteOh, my goodness this is fantastic mail art! Perfect for the challenge as well! Thank you so much for sharing with us at Stampotique!
ReplyDeleteWow - awesome mail art - love it!
ReplyDeleteThanks for joining in with us at Stampotique :)
Superb post and what an amazing background...love the softness, thanks for joining in with Stampotique Designers Challenge
ReplyDeleteSuperb post and what an amazing background...love the softness, thanks for joining in with Stampotique Designers Challenge
ReplyDeleteOh, I just love mail art. What a well-done envie! Great colors and image choices. Happy Halloween and thanks for joining us at the Stampotique Designers Challenge.
ReplyDeleteSuper fun Mail Art! (and you know I love mail art!) Also you are making me to order Linda! She is on my wish list! Thank you for joining the challenge at Stampotique originals!
ReplyDeleteamazing thank you for sharing. when you said you will seal with varnish, what and how do you do that?
ReplyDeleteHi Lois, thanks for your comment and the seal is use is liquitex either matte or gloss, and just gently apply it on the envelope with a brush. Let it dry well before mailing off. It keeps the envie a bit protected from the elements.
DeleteSo wonderful! I love the background and the stamps you used. Great piece of mail art!
ReplyDeleteThank you for playing along with us at Stampotique Designers Challenges!
Wow that's awesome <3 Love your mail art!
ReplyDeleteThanks for joining us at Stampotique :)
xx Arwen
A fantastic piece of Halloween mail art. So much depth to your piece. It's stunning! Thank you for taking part in this months Mixed Media Monthly Challenge. Hugs, Clare DT
ReplyDeleteSaw your envelope over on the Mixed Media Monthly challenge and would love for you to join my snail mail art group on FB if you want. Would also love for you to post this there! https://www.facebook.com/groups/1649512122042415/
ReplyDelete